Showing posts with label Spring. Show all posts

Thursday, April 30, 2015

"Arrivederci" Artichokes {White Wine Braised Artichokes}


Alas, it has been a good run. The local artichokes this year have been plentiful, tender and delicious. I've steamed them, stuffed them, and grilled them. I even pickled a whole mess of them to use when the last of the fresh ones are gone.  We're nearing the end of the season for them, and so, with that in mind, I have one last fresh artichoke recipe to share for now.

This is a new-to-me way to prepare them, but it has quickly become one of our favorite ways. Delicious just as they are when finished, these braised artichokes have a lot of potential to be the base of some other rather delicious dishes. But, first things first, here's what I did to make these delicious things.


White Wine Braised Artichokes


  • 3-4 lbs of baby artichokes (or larger artichokes prepared down to the light green/yellow parts)  - about 18-20 artichokes
  • 1/4 C olive oil
  • 3 garlic cloves, thinly sliced
  • 2 C white wine (dry)
  • 2 Tbsp capers, drained
  • 2 Tbsp fresh mint leaves, torn (optional)
  • 2 Tbsp flat leaf parsley, roughly chopped
  • 1 lemon, juiced

  1. Pour lemon juice in a large bowl of cool water.Prepare the artichokes by breaking off all of the tough outer leaves until mostly light green-yellow leaves are left. Using a sharp knife, cut about 1 inch off of the top of the artichokes. Leave about a half inch of stem but remove any tough outer part of the stem as it will be bitter. Place prepared artichoke into the lemon water. This will help to discourage discoloration. (If using large, commercially available artichokes, you'll also need to remove the choke from the center of each item.)
  2. When each artichoke is ready, drain them on paper towels for about 2 minutes (stem side up); pat dry.
  3. In a large heavy pot, heat oil over medium high heat. Place artichokes into the pot, cut side down and lower heat to med-low. Scatter garlic slices over the artichokes, and season with salt and pepper to taste. Cook until garlic is just golden (do not stir) for about 3 minutes or so.
  4. Add wine to the pot, reduce heat to low and simmer (covered) until the artichokes are very tender. Depending upon size and age of the 'chokes you get, this could take anywhere from 30-45 minutes. (Check tenderness by piercing the top of the artichoke with a fork or skewer - when it slips in easily, they're done)
  5. Add capers and cook uncovered (on medium) until wine has almost completely evaporated. Add herbs and cook until artichoke tops are golden (about 3 minutes; reduce heat to avoid scorching the 'chokes).
  6. Serve warm or at room temperature.


These are fabulous as is - and that is how we enjoyed them. I also used leftovers to create a fabulous pasta dish. Simply take these cooked artichokes and quarter them. Cook up some cubed pancetta, add some sliced mushroom and saute until cooked through. Add the quartered artichokes, a 1/4 of heavy cream and cook until thickened. Toss this mixture over some freshly cooked pasta (shape of your choice) and you'll have a delicious dinner that only slightly resembles that first dish. It's one of my favorite ways to cook - one dish that transforms into something else! 

Happy Cooking!
sld

Tuesday, April 14, 2015

What's with all the fuss? {Rhubarb Syrup}


Rhubarb was definitely not a "thing" for me as I was growing up. It is not a typical Texas crop. I know some folks have memories of their mothers or Grannies or aunts having a rhubarb patch and eating it in the Spring, but it just isn't a standard Texas thing. I've always heard that rhubarb and strawberries are put together in simple spring desserts and that they pair well due to rhubarb's tart flavor and the sweetness of the strawberries. But, I've never actually seen rhubarb up close and personal, worked with it or tasted it. So, in an effort to remedy my ignorance, I picked up some rhubarb from the nice folks at Two Happy Children Farm and set to uncover the allure of the rhubarb.

From my reading, I learned that rhubarb is botanically a vegetable but it typically used as a "fruit" in its preparations. The portion that is used in food is the long stems, or petrioles, which are tinged deep red when ripe. The lush leaves are trimmed away as they have toxic properties and can cause skin irritation. Historically, rhubarb was used for medicinal properties by the Chinese for thousands of years. It has only been used as food relatively recently with the first recorded recipe for rhubarb appearing in 1806 or so in a cookbook written by Maria Eliza Rundell. Classified as a "super food" it has only about 7 calories per 100 grams of rhubarb and has been noted to speed up the metabolism. Additionally, it is high in calcium, so it makes a great addition to the diets of folks who are dairy-free or for anyone who is looking for a fat free source of calcium.

For my first foray into the wonderful world of rhubarb, I decided to start with a super simple recipe for a rhubarb syrup.

Rhubarb Syrup

adapted from Marissa McClellan

  • 1.5 lbs of rhubarb, washed and coarsely chopped
  • 3 C water
  • 2.5 C white sugar
  • 1 whole vanilla bean pod
  1. Combine chopped rhubarb with 3 C of water in a medium pot. Bring to a boil. Reduce the heat and simmer until the rhubarb is a mashable pulp (about 15 minutes).
  2. Strain rhubarb into a large bowl through a fine mesh strainer. Let the liquid pass and drain on its own. If you mash the rhubarb to "help along" the process, you'll end up with a cloudy syrup - so, avoid if you can.
  3. Discard the pulp left behind in the strainer and put the juices back into a pot. Add the sugar and vanilla and stir well. Over medium heat, bring mixture to a boil. Be sure to skim any foam that forms on top. Also, watch the mixture carefully. With such a high sugar content, once a boil starts, it can become very vigorous and boil over quickly. Turn down heat to avoid this or you'll be cleaning up a sticky mess from your stove top!.
  4. Remove pot from heat and pour hot syrup into a jar for storage. (If you water bath can, this can be processed in properly prepared half-pint jars for 10 minutes.)
This made a beautiful syrup that has a tartish, citrus-like, but not, very indescribable taste. I'm looking forward to drizzling it over vanilla ice cream and over melons (when they come into season).  

I'm already looking forward to more rhubarb experimenting and have a chutney and a tart in my sights. If you've not ever used rhubarb, I recommend giving it a whirl. If you're an old-hand with rhubarb, I'd love to hear what you do with it!

Happy Cooking!
sld


Wednesday, May 21, 2014

A Spring Mix {Layered Lemony Orzo Salad with Strawberry Glazed Grilled Chicken}

I have what one might call an affinity for jars. Okay, that might be an understatement; it might just be an obsession. I don't know if it is the nostalgia reminding me of the pickled okra or preserved figs that my Grandma Mary would "put up" each year that makes them so attractive. Or, just how useful they are for all sorts of storage (for food and otherwise) that compels me to buy a case each time I happen upon a new shape, size or color. 


For years, I've used glass canning jars as serving dishes for a wide variety of desserts like creme brulee and peach fools. When I saw them used as a super easy way to carry and serve individual servings of salad, I was hooked. I first made this salad as part of our family Easter meal and it was such a success that I knew it would be part of the next TGK Cooking Club session. Starting with this Layered Lemony Orzo Salad as a jumping off point, I created a menu for A Spring Mix that also had a common thread of strawberries running through it.  It was a great way to enjoy some of the best flavors of the season. 

One of the lucky by-products of these dinner classes is leftovers. We enjoyed that Lemony Orzo salad for lunch a couple of days and this evening, I decided to add some grilled chicken thighs as a topper on the salad to change it up and make it a whole new meal. 


Layered Lemony Orzo Salad (adapted from Rebecca Rather)

serves 6

Dressing

  • 1/4 C freshly squeezed lemon juice (about 1 large lemon)
  • 1/2 C white wine vinegar
  • 2 Tbsp honey
  • 2/3 C olive oil
  • 1/2 C Feta Cheese, crumbled
In a quart jar (or medium bowl) add lemon juice, vinegar, honey and olive oil. Seal tightly and shake well (or whisk if using a bowl). Season with salt and pepper to taste and then add feta. Shake or whisk. Cover and refrigerate until ready to use. 

Salad

  • 1/2 lb orzo (found in pasta section of grocery store)
  • 8 oz salad greens (I like mixed baby greens that have a bit of arugula for a peppery taste)
  • 3 green onions, thinly sliced to include part of the green tops
  • 1 C cherry tomatoes, halved
  • 1/4 C pitted kalamata olives, chopped 
  • 1 cucumber, peeled and coarsely chopped
  • 1/2 C Feta Cheese, crumbled
  • 1/4 C pine nuts, toasted
  1. Cook orzo according to package directions. Drain and run under cold water to stop cooking process. Place orzo in a medium bowl and toss with 1/4 C of the prepared dressing. In a small bowl, mix together the green onions, tomatoes, cucumber and olives. 
  2. Assemble salads: have 6 (1-pint) wide-mouth jars with lids ready. In each jar: spoon 1/3 C of the orzo mixture; 1/4 C vegetable mixture; 1 Tbsp feta cheese; 1/2 C packed greens. Spoon about 1 Tbsp of  dressing on top of each salad and sprinkle with 1 tsp pine nuts. (You will have additional dressing left over for another use of your choosing.) Top with lids and keep refrigerated until ready to serve. When it is time to eat, give each guest a jar and have them shake the jar to mix up the contents and enjoy!
If you don't have the jars and don't want to invest, this salad is just as lovely tossed up in a large bowl and served in salad bowls. In fact, that is what we did as we re-worked this salad for dinner last night. Tossed it up in salad bowls and topped it with: 

Strawberry Glazed Grilled Chicken 

  • 4-6 boneless skinless chicken thighs
  • 1/4 C strawberry jam
  • 1/4 C olive oil
  • 3 Tbsp apple cider vinegar
  • 2 Tbsp water
  • 1 tsp sugar
  • 1 clove garlic minced or through the press
  • salt and pepper to taste
Whisk together all ingredients except chicken. (This is a fabulous vinaigrette(adapted from Southern Living Magazine)  that we used on a slaw during cooking class - I used the leftovers to marinate the chicken later in the week). Marinate chicken thighs in 1/3 C or so of dressing. Grill outdoors until done. Slice in thin strips and top the orzo salad. 

This was such a great combo. The light lemony flavor was paired well with the sweetness of the strawberry marinade on the smoky grilled chicken. It was a great way to freshen up some leftovers and make for a very quick dinner!

Fresh Salads and grilled meats are a hint that Summer is right around the corner,  and quick dinners are always a good thing - try it out and let me know what you think.

Happy Cooking!
sld

Thursday, April 25, 2013

The Return of the Artichokes {Marinated Artichoke & Feta Tart}

When last we spoke of my mass artichoke purchase, we had steamed them as is de rigueur. We had grilled them a la Molly's Dad (lightly steam, cut in half, rub with some olive oil and grill until lightly charred with grill marks; serve with mayo/aioli dipping sauce of your choice). We had Tuscan Stuffed them. After a couple turns of each of these ways, I still had about 10 'chokes left.  One of our friends on facebook suggested pickling them and provided a great recipe from Marissa McClellan, a food writer and canning teacher whose book Food In Jars was published in 2012. What better way to preserve those last few artichokes than to pickle and marinate them to be used after a short break in the artichoke extravaganza?


Marinated Artichoke Hearts (adapted from Food In Jars)

  • 8-10 trimmed artichoke hearts; halved or quartered (make sure to remove all outer, tough, leathery leaves, farther than you might think, to get to the tender, pale sweet leaves) 
  • 1/2 C  vinegar (of your choice - I used some white balsamic, and some white wine; next time, I would do 3/4 C vinegar and 1/4 C water to increase the acidity of the pickling solution as it wasn't quite tart enough for me)
  • 1/2 C water
  • 2-3 Tbsp extra virgin olive oil (enough to top off your jars)
  • 1 Tsp fine grain salt
  • 1 fresh bay leaf
  • 1 garlic clove (sliced or minced - the more surface area of the garlic, the more garlicky the seasoning will be, so you can adjust to your liking based on how much or how little you cut/slice/mince the garlic)
  • 1/4 Tsp black peppercorns
  • 1/4 Tsp red chili flake

  1. In a small saucepan, combine vinegar, water and salt and bring to a boil. In the bottom of your mason jar, place the flavorings: garlic, peppercorns, chili flakes, and bay leaf. Then, pack the jars with the artichoke pieces. Be sure to leave some headroom so that there is enough room for the artichokes to be completely covered by the pickling solution and olive oil.  Pour hot pickling liquid over the artichoke hearts and tap gently to dislodge any air bubbles.
  2. Top off the jar with olive oil until the artichoke hearts are covered. Place a lid on the jar and shake to help distribute oil. Leave jar(s) out on counter until they are completely cool. Once cool, refrigerate.
  3. Let artichokes marinate for at least 24 hours before eating. Since these artichokes haven't been processed for shelving, they will keep for at least one week in the refrigerator.
Note: Next time I make these, I will lightly steam the artichoke hearts before packing into the jars as they were a bit too "green and raw" for my taste with just the cooking from the hot pickling solution.

These are quite tasty as is and would be a great addition to a salad or an antipasto tray. Or, as I did last night...


Marinated Artichoke and Feta Tart (adapted from Bon Appetit)

  • 1/3 C cream
  • 4 oz feta cheese, divided
  • 1 17.3 oz pkg of frozen puff pastry (2 sheets), thawed
  • 8 oz of marinated artichoke hearts (drained and halved); made from recipe above or purchased from grocery store
  • Olive oil
  • 1 lg egg, beaten to blend (see note below)
  1. Preheat oven to 425F. Blend cream and 2 oz of feta until smooth (I did this with my stick, immersion blender - you can use a food processor, if you have one and want to deal with that, or even just a hand mixer to reduce the amount of cleanup required.)
  2. From your 17.3 ounce package of pastry, unfold each onto a piece of parchment paper, and lightly roll it out to smooth the fold marks. Place the parchment and pastry on top of a baking sheet. Using a sharp paring knife, make a frame/edge to your crust by lightly scoring the pastry about one inch in from all edges (make sure not to cut all the way through)
  3. Spread the feta-cream sauce over the pastries (divide evenly between the two) and stay within the frame-like border. Arrange the artichoke pieces evenly over the feta sauce and crumble the remaining feta over the pastries evenly as well.; drizzle with olive oil and brush the border with the beaten egg wash to glaze the crust.
  4. Bake at 425F for about 10 minutes or so; until the pastry is puffed and beginning to lightly brown. Reduce heat to 375F and continue to cook until the pastry is deep golden in color and the tarts are cooked completely through (about 20 minutes longer - keeping an eye that they don't get too dark)
  5. Serve warm or room temp (they can be made up to 2 hours in advance and left to stand at room temp.)
Note: if you'd prefer not to use an egg for the wash since the entire egg will not be used and unless your scramble it up to eat, it will be wasted, you can use a cream wash on the crust. The results are as follows: 
  • egg wash- super shiny, browned finish to baked goods
  • cream or milk wash - no shine, browned crust
  • butter wash - matte, soft finish - no crispness
This tart was out of this world fantastic and considering that puff pastry and marinated artichokes (or canned, even) should be freezer and pantry staples, this is a good standby recipe to whip up when you don't have anything planned. If your clan aren't artichoke eaters, you could sub in some caramelized onions as well.  Served with a standard green salad, this tart was a delicious, quick and rather "Fraunchy" meal.

Happy Cooking!
 sld

Monday, April 22, 2013

Broccoli Slaw


If you happen to follow along on facebook or instagram, then you saw some gorgeous broccoli that was brought to me from my neighbors who happen to also be the farmers responsible for Two Happy Children Farm. These are the same fine folks from whom I procured my bulk purchase of artichokes and launched me into an artichoke extravaganza (Yes, yes we did eat 30 artichokes over the course of a week. Well, not exactly true as I pickled some and those are still in the fridge. But who's counting.) With 3 large heads of broccoli at hand, what's a gal to do? Then I remembered a great slaw we'd had during a visit to Port A (Port Aransas, Texas). We had picked up some fried chicken and sides from a chicken shack on Alister St. The chicken wasn't remarkable, but one of the sides was a broccoli slaw. Up until that point, all of the slaws I'd had were the standard cabbage. This broccoli slaw was a mixture of broccoli and cabbage with a sweet and tangy mayonnaise based dressing tossed with raisins and nuts. A nice combination that would make an appropriate spring side to go along with grilled pork ribs.


Broccoli Slaw

  • 2 heads of broccoli 
  • 1/2 C purple onion, finely chopped
  • 1/2 C raisins 
  • 1/4 C sunflower kernels (The garlic flavored from Buc-ee's *  that I had on hand from our last   shopping spree pit stop worked pretty well.)
  • 1/2 C mayo
  • 3 Tbsp of rice vinegar (or apple cider vinegar)
  • 1 Tbsp soy sauce
  • 2 Tbsp sugar
  1. Cut broccoli into smallish florets and stems into small chunks. Lightly steam the broccoli to set a bright green color and to lightly cook. (I'm not a fan of raw broccoli at all, if you are, you can skip this.) 
  2. In a large bowl make the dressing: whisk together the mayo, vinegar, soy sauce and sugar. 
  3. Stir in the onion, raisins and sunflower kernels. Add the cooled broccoli and toss to coat with the dressing and add-ins. Chill in fridge until ready to serve.
Notes: 
  • I like to steam vegetables using the microwave as it is super quick and easy and uses very little energy or water. Place the broccoli in a microwave safe dish with about a 1/4-1/2 in water in the bottom. Cover loosely with plastic wrap and microwave for right about 2 minutes. The broccoli will be a nice bright green rather than the blue/grey green when it is raw and will cook it just enough to soften it but still retain its crispness.
  • If you don't have sunflower seeds, nuts (roasted and salted) of any type, but especially almonds,  would be a fine substitution.
  • Crispy fried bacon bits could be added to gild the lily.

This slaw was delicious with my daughter commenting it was the best she's had. The sweet-tart dressing, the sweetness of the raisins, the salty nuttiness of the sunflower kernels and the sharpness of the purple onion are fabulous when mixed with fresh, crisp broccoli. 

Happy Cooking!
sld

* For those of you who are not from around here, Buc-ee's is chain of convenience stores in the Gulf Coast and Central regions of Texas. It can be described as nothing short of fabulous. The location we frequent is in New Braunfels and as of this writing it is the largest convenience store in the world with 67K sq ft of store, 60 gas pumps & the best restrooms in the US (2012) as rated by Cintas. In addition to its enormity, it has a vast array of delicious food items including your standard convenience store fare along with a rather astonishing selection of private label items and even some things that could be found in specialty/gourmet shops. I'm not ashamed to say I love the place & that is where I picked up those garlic sunflower kernels on my last trip home to my parents' place in the Hill Country.

Friday, April 12, 2013

Tuscan Stuffed Artichokes


Since we've really made an effort to eat as much locally sourced produce as we can over the course of the past 2 years or so, that means taking advantage of vegetables during their actual season. It is now or next year for many vegetables with a relatively short growing season.  

Recently,a local farm was offering bulk artichokes.  For $32, they were offering a half-bushel of these unusual vegetables. Based on general size-grading, that is 24 artichokes per count. As I had just been to the local grocery store and had seen artichokes priced at close to $5 a pop, I couldn't pass up this opportunity to try these super fresh, locally grown gems.


I messaged the farmers and asked how to make arrangements to get the goods. Lucky for me, they were able to deliver direct to my door. Either they are incredibly nice, or just that they are trying all means necessary to get rid of this bumper crop of 'chokes, but when they were delivered to my door, they gave me an extra half dozen artichokes (a farmer's bushel rather than a baker's dozen, I guess?)

So, with giant bag o' overgrown thistles in hand, the gauntlet was thrown. Let the games begin! 

The first night was easy - simple steamed artichokes. They were absolutely wonderful. Even though they are rather large in size, they are quite young as none of them that I prepared that night had the unpalatable furry choke at the center. That meant that other than the tough outer leaves, the rest of the vegetable could be eaten straight down to that delicious heart.

The next night, these Tuscan Stuffed Artichokes were the featured item. El Syd has fond memories of his mother making a similar dish when he was a kid, so it was fun to make them for him. 

In order to make these, you must first prepare the artichokes for stuffing. 

  • It is important to thoroughly rinse the artichokes and even give them a light brush with a vegetable brush as this will help to remove the natural light film that the artichoke produces as it grows. This film can give the artichoke a bitter taste if not removed. 
  • If you're planning on standing the artichokes up in a pan, you'll need to trim off the stem. Since the stem (or at least the core of it) is a continuation of the artichoke heart (the best part of the whole thing), only trim it if absolutely necessary. Also, trim the top off about one inch down from the top of the artichoke. To pretty the whole thing up, use scissors or kitchen shears to cut the tips of each of the leaves as they typically have a small thorn on the top. If you're going to cook them later, rub the cut edges with a lemon to keep them from browning, or you can submerge them in lemon water until you're ready to cook them.
  • To get them ready for stuffing, I like to remove the center leaves to make a hole or pocket for a bunch of filling. For larger, more mature artichokes, it is easier to lightly steam them and then remove those center leaves and that fuzzy choke before stuffing. For young, tender artichokes (like the ones I have now) a sharp tug at those center leaves have them coming out and with no fuzzy choke, they are ready for stuffing.

Tuscan Stuffed Artichokes 

  • 4 medium artichokes
  • 4 Tbsp olive oil
  • 4 Tbsp fresh, toasted breadcrumbs
  • 1/8 C fresh flat-leaf parsley, minced
  • 3 Tbsp Parmesan cheese, grated
  1. Preheat oven to 375F. Prepare artichokes for stuffing. Spread the leaves open slightly so that you have more nooks and crannies into which the stuffing can fall.
  2. Combine all ingredients, except the artichokes. Using a small spoon, fill the cavities of the artichokes with the stuffing mixture. 
  3. Place stuffed artichokes into a baking dish (if you pared off longer stems, you can use them as supports at the base of the artichokes - make a grid).
  4. Add 1/2 inch of water into the bottom of the dish and add a tablespoon of olive oil.
  5. Tightly cover the dish with foil and bake until the artichokes are tender (time will vary depending on if you slightly steamed them or not, and their size. For a medium to large artichoke that was totally raw, allow about 45 minutes. ) 
  6. Serve warm or at room temp. To eat: To eat, pull off the leaves and scrape them along your bottom teeth, picking up stuffing as you go. For the outer leaves, you're just removing the pulp and will be tossing the very fibrous tops. As you get closer to the center, the leaves will become more and more tender and you'll be able to eat more and more of the leaf. Once you eat all of the leaves, cut the heart into chunks and eat with remaining stuffing on the plate.
If you've only ever had artichokes that have been frozen or from a can, I highly recommend this way of preparing the fresh variety. The crispy savory seasoning is a fabulous match for the natural sweetness of the artichoke flesh. Once you get the hang of it, they aren't nearly as scary as they seem at first look. 

Seven down; 23 more to go....ideas?

Happy Cooking!
sld


Monday, April 1, 2013

The Devil(ed egg) is in The Details


What to do with all of those hard-boiled, beautifully-dyed, eggs? An egg-salad is a predictable next step, but my favorite thing to do with these treasures is to devil them. Yup, Deviled eggs appear on many a pot-luck, holiday, or family-gathering table. And, for as many Aunts and Grandmas as there are in Texas, there are recipes. While our family gets serious about a lot of other recipes and very insistent on the methods of other dishes, deviled eggs have been a relatively stress-free item with no real recipe and no strong opinion about what is "right." These are so easy to make that, often times as a kid, I would take just one egg and devil it myself as a snack. I still do that on occasion when I am in need of a quick snack or lunch.

My standard quickie single deviled egg is as follows: 

  • Peel egg and slice in half lengthwise.
  • Reserve egg white for refilling
  • Place yolk in a small bowl and mash with the tines of a fork.
  • To the mashed yolk, add a sprinkle of garlic salt and pepper; a dollop of mayonnaise (a generous, rounded teaspoon for those who measure); a shot of plain ol' French's yellow mustard (about a tsp); mix well and then refill the whites with the egg yolk mixture.(if the mixture seems a little dry, add a bit more mayo)
  • If you are feeling super fancy, sprinkle with a little paprika or even fancier a few snipped fresh chives.
  • That's it - enjoy!
However, when thinking about how to change it up a bit, another fabulous treat popped into mind: Pimento Cheese - (or likely, for those of us with deep Texas roots, puh-men-nah cheese). This creamy, delicious, cheesy spread also appears at many (if not all) of the same meals as a deviled egg. I'm not talking about the stuff in the plastic tub at the grocery store that is a shade of orange not found in nature. But, instead, the real deal, homemade, pimento cheese that I grew up on.  A nice longhorn cheddar or colby, grated by hand mixed with a jar of pimiento peppers (diced), some grated onion, some grated tomato and then mixed with just the right proportion of mayo to make a spread that is divine on white bread for a sandwich, or spread on crackers or on occasion, rolled up in a leaf of ice cold, crispy iceberg lettuce.

So, why not kill two birds with one stone and do a mash-up?


Pimento Cheese Deviled Eggs

  • 6 hard-boiled eggs - peeled, cut in half-lengthwise
  • 3 Tbsp mayo (maybe a 4th if you like your filling uber creamy)
  • 1 Tbsp yellow mustard (if you like more tang and zing, add more mustard than this)
  • a few shakes of garlic salt & pepper - to your liking
  • 1 Tbsp of grated sweet onion
  • 1 Tbsp of grated fresh tomato
  • 1/3 C of finely grated "Longhorn" cheddar or colby (or mix of cheeses if you prefer)
  • 3 Tbsp of diced pimientos (jarred)
  • a sprinkle of paprika (optional)
  • a sprinkle of cayenne pepper (optional)
  1. Scoop the yolks into a small mixing bowl and mash with the tines of a fork until relatively smooth. Stir in the mayo, mustard, garlic salt & pepper, grated onion and tomato, cheese, and pimientos. Stir/mix until well-combined and smooth-ish.
  2. Scoop mixture into the wells of the egg whites (if you've got the talent to pipe it in, go on and do it. Me? I just scoop)
  3. Top with a sprinkle of paprika and/or cayenne, if using.


Happy Cooking!
 sld


Wednesday, March 20, 2013

Pasta Primavera


Ahhhh...the first day of Spring....the leaves are peeking out of every branch of our trees and the grass is starting that familiar change from dormant hay to vibrant green. It's calling to me. Over the weekend, I planted, or replanted I should say, my herb beds and am getting ready for a Spring and Summer filled with light, bright food where fresh, lush vegetables are the focus. I've turned the corner from the root vegetables and the heaviness of winter squashes to the succulent, light, vibrancy that is on its way - tomatoes, eggplant and corn won't be far off now.

So, what better way to signal Spring than with the eponymous dish. Primavera is Italian for Spring and while this dish isn't truly Italian at all, being invented at Le Cirque in the 1970's, it is still a delight. It makes frequent appearances in our home all Spring and Summer. This version, adapted from Giada DeLaurentis, cuts out the blanching of the original and instead features roasted vegetables (what else?!) The results are a sweet, caramelized showcase of the vegetables' natural flavors.

Pasta Primavera (adapted from Giada DeLaurentis)

  • 1/2 lb carrots, peeled
  • 1/2 lb summer squash (your choice - zucchini, yellow squash, a mixture)
  • 2 ripe sweet peppers (your choice - red, yellow or orange, a mixture)
  • 1 large sweet onion, thinly sliced
  • 1/4 C olive oil
  • 1 Tbsp Italian herbs or herbes de Provence
  • salt and pepper to taste
  • 1 lb dried bow-tie pasta
  • 20 cherry tomatoes (either halved, if large or left whole if small)
  • 1/2 C shredded Parmesan cheese
  1. Preheat oven to 450F. Cut carrots into 1 in rounds(on diagonal if you want to get "Fraunchy"); cut squash into 1/2 thick half circles; cut bell peppers into 2 in strips. On a large baking sheet, toss the vegetables (including onions) with the oil and dried herbs; sprinkle with salt and pepper. Mix until well coated. Transfer half of the vegetable mixture to another baking sheet. (I like to line my pans with foil to help cut down on the clean up mess.) Arrange the mixture evenly over both sheets and bake in the oven. Stir after first 10 minutes and continue cooking until the carrots are tender and the other vegetables begin to brown lightly (about another 10 minutes for a total of 20 minutes.)
  2. While the vegetables are roasting, bring a large pot of water to a boil. Add the bowties and cook, stirring occasionally, until tender, but still firm (al dente), about 9-10 minutes. Drain, but reserve about 1 cup of the cooking liquid. Return the pasta to the pot, toss in the roasted vegetables to combine. Add the cherry tomatoes and just enough of the reserved cooking liquid to moisten. 
  3. Transfer to serving bowls; season with additional salt and pepper if you like. Sprinkle with Parmesan cheese and serve.
Happy Cooking!
 sld

Monday, February 25, 2013

Pancetta & Leeks

This month has been foodie month. What with 3 family birthdays, The Super Bowl, Lunar New Year, Mardi Gras, and the Oscars, there have been ample opportunities for cooking. This past weekend, we celebrated the birthdays of my son, and my mother and father. So, yes, a special meal was in order. I am a notorious planner and also have a penchant for regionally themed meals. Usually, everything flows from soup to nuts. However, along with all of these extravaganza events has come a certain level of excess. I discussed with El Syd (formerly referred to as The Husband - yes, a blog-worthy moniker has been agreed upon) all of my ideas and then discussed it more with Mama, and finally just decided on a simple pasta dish and a decadent dessert. No rhyme, no reason, no theme. The main dish, Pancetta and Leeks over Homemade Fettuccine (yes, I will discuss that whole process, soon - I promise.) was truly simple and mirrored the hint at Spring with which Mother Nature has been teasing us (Here, in Texas, that is.) The saltiness of the pancetta was the perfect foil for the natural sweetness and creaminess of the leeks. Leeks might just be my new favorite underutilized vegetable. They have just that hint of onion flavor without any of the strong and overpowering zing of onions. Due to their rather fibrous nature, when cooked thoroughly, they are silky and creamy. Just so wonderful.


Pancetta and Leeks over Fettuccine (inspired by bon appetit magazine)

  • 2 Tbsp olive oil
  • 1 Tbsp. unsalted butter
  • 1/4 lb pancetta, thickly sliced and cut into ~1/2" pieces
  • 2 medium leeks, white & pale-green parts only, halved lengthwise and sliced crosswise into half circles (see note)
  • 3/4 C heavy cream
  • 2 Tsp. chopped thyme(fresh)
  • 1 lb fettuccine
  • 1 C finely grated Parmesan cheese 
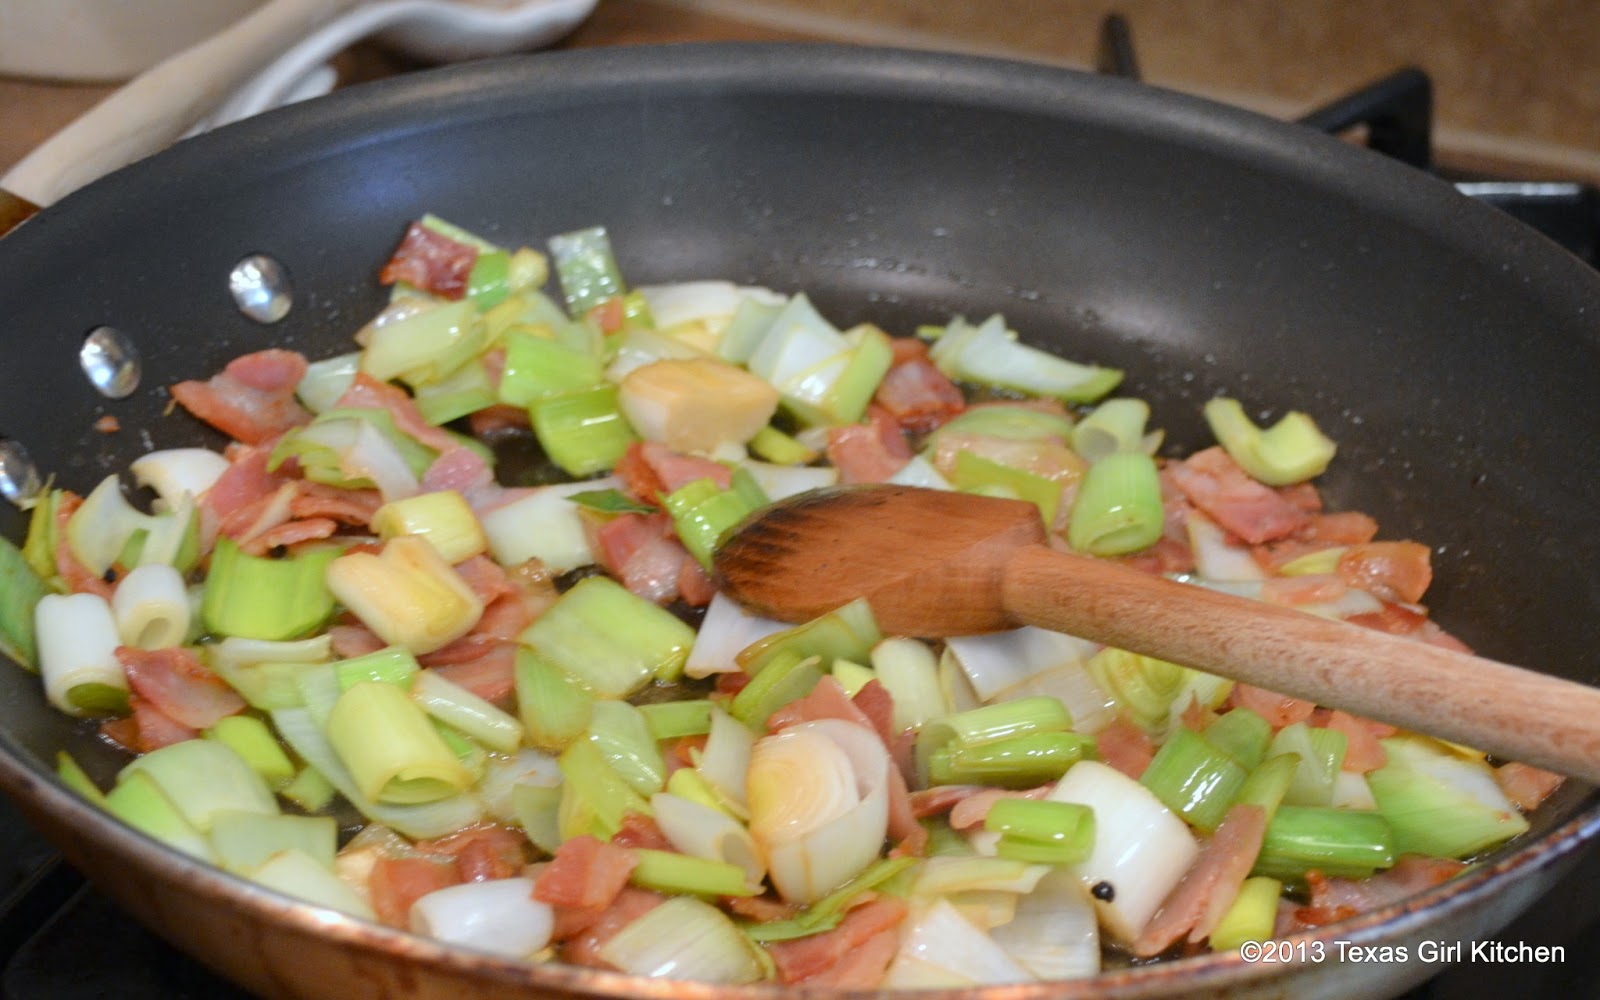
Pancetta & Leeks in oil and butter
Following the addition of the cream
  1. Before starting sauce, begin to cook pasta in large pot of boiling salted water, stirring occasionally until al dente. Drain pasta, reserving 2 cups of cooking liquid. While the pasta is getting going, you can start the sauce so that both are ready at about the same time.
  2. Heat oil and butter in a large skillet over med. heat. Add the pancetta and cook, stirring often, until the fat is rendered and the pancetta is crispy (around 5-6 minutes.) 
  3. Add leeks and season with salt. Increase heat and cook, stirring often. Continue until leeks begin to brown (another 5-6 minutes.)
  4. Add the cream and thyme, and 1/2 C water. Bring to boil, then reduce heat and allow to simmer/thicken about 5-8 minutes more. (Sauce should cling to your spoon a bit.)
  5. Add sauce, parmesan, and 1 cup of the cooking liquid to pasta and stir to coat the pasta. Add more cooking liquid as needed to make sure the sauce coats the pasta. (Don't add too much of the cooking water - just until the pasta is well coated. I only needed 1 cup)
  6. Serve and enjoy.
Note: Leeks tend to be very good at hiding tiny bits of dirt and sand in their tight layers. For best results, split lengthwise, then cut cross-wise into half-circles or "c's" and then use a colander or sieve to hold the leek pieces while you rinse well with water- making sure to clean all of the sand/dirt off.

Happy Cooking!
sld