Showing posts with label desserts. Show all posts

Monday, December 21, 2015

Merry Christmas! {Boozy Bourbon Balls}


We've been spending some time getting ready for Christmas around here. In the past, I've spent a good amount of time baking a variety of Christmas cookies. Last year, I changed things up and focused more on confections: Grandma's Pralines, Pecan-Buttermilk Fudge, Salted Bourbon-Caramels & Homemade Marshmallows. My daughter (Sweet T) & I have plans to do the same this year. So far, we've had a fudge failure. But not ones to admit defeat, we've decided to attempt to turn that into some handmade chocolate covered candies (we'll regroup tomorrow on that one.) Following that little sidestep, we needed a sure-fire success. So, I dug around in Grandma Mary's recipe book and dug up a family favorite - The Boozy Bourbon Ball. These were a holiday staple that, in a funny turn of events, my Grandma stole from my Mama.

As previously mentioned, my Grandma was quite the spitfire. She loved a good mixed drink and her poison of choice was Bourbon and (diet) coke (she had to watch her girlish figure, after all.) While these treats don't have any coca-cola, diet or otherwise in them, there's something about the strong bourbon scent that reminds me of many, many Sundays spent spinning around on the bar stools at my Grandparents pinewood bar in their living room while the conversation and the liquor flowed. During the holidays, there was always a jar of these on the table of goodies. Having taken a small nibble, they weren't something that my childhood self enjoyed at all, but as an adult, they have become much, much more appealing.

With only some melting, stirring and shaping required, these are a very easy treat to make for the holidays. 
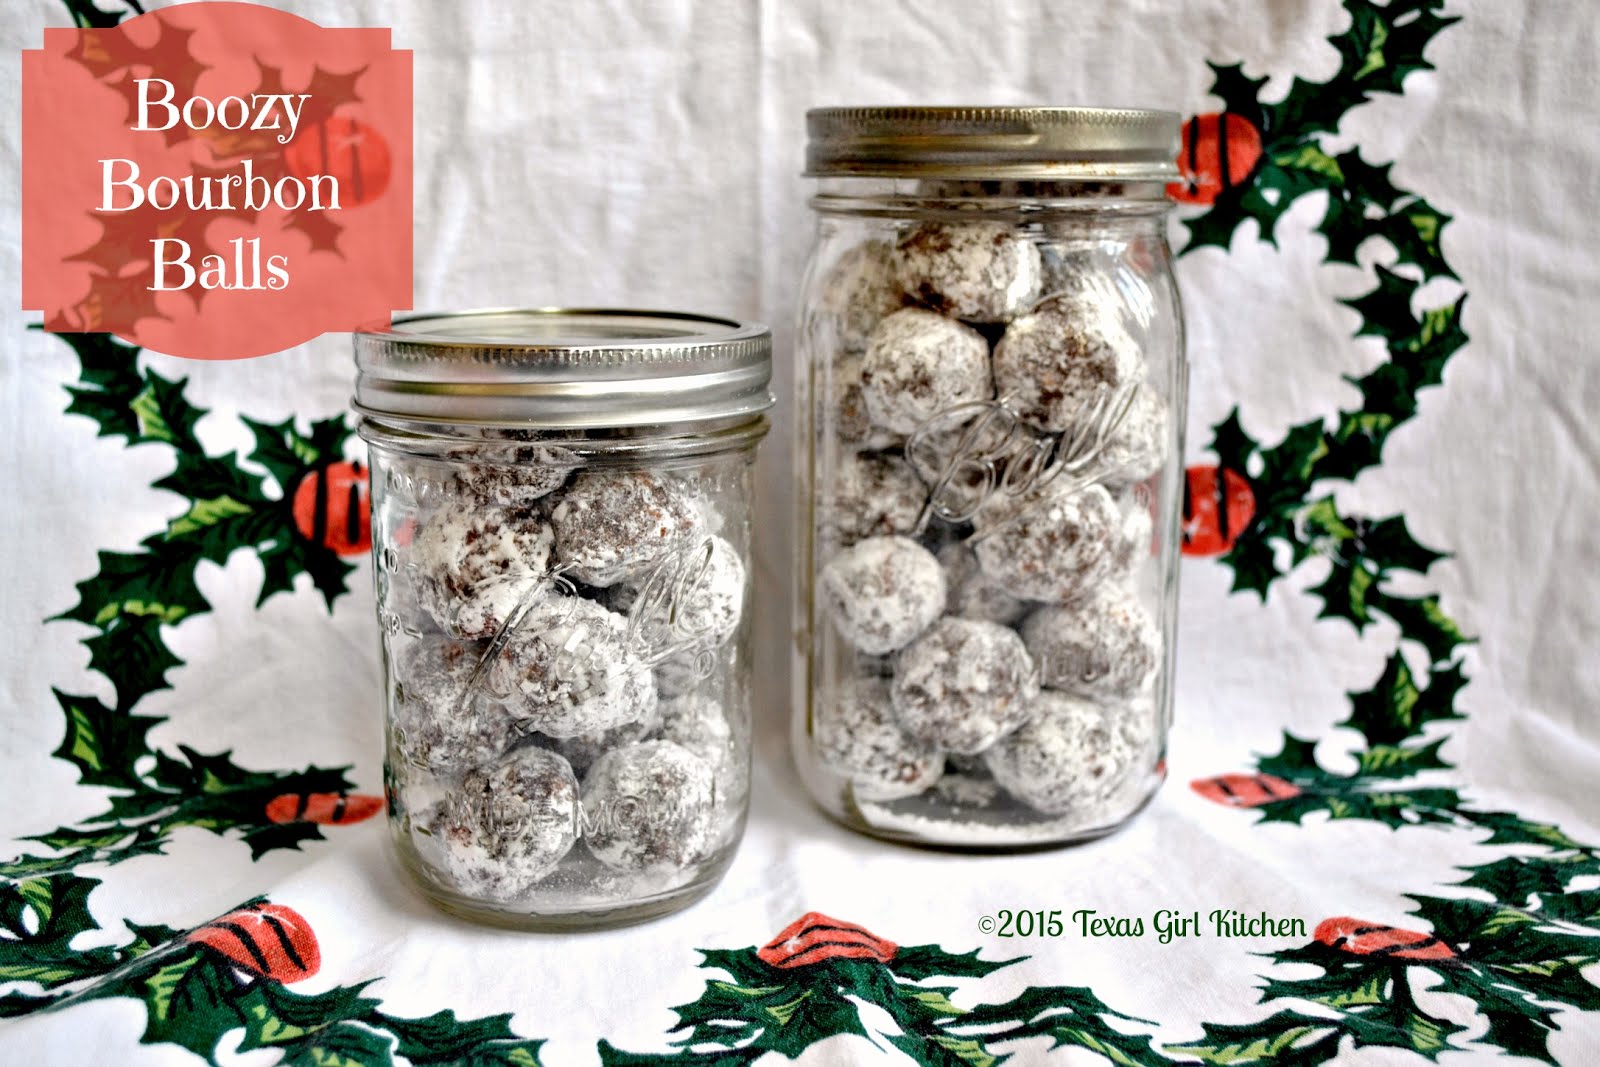


Boozy Bourbon Balls(makes 40+; enough for giving some and keeping some)

  • 6 oz semisweet chocolate chips
  • 1/2 C white sugar
  • 3 Tbsp light corn syrup
  • 1/2 C bourbon
  • 1- 11oz package of vanilla wafers, crushed to a fine meal
  • 1 C finely chopped pecans
  • powdered sugar, to toss rolled balls in

  1. Melt chocolate chips over medium heat, watching closely so they don't scorch. Remove from heat & stir in the white sugar, corn syrup and bourbon. Whisk until smooth. Add the wafers and nuts and mix well.
  2. Form into 1 in. balls and roll in powdered sugar. Allow balls to set on a tray for an hour or so. Then, place in an airtight container and let "ripen" one week.

Of course, you can always eat them right away, but they really do taste better if they have a chance to mellow a bit.

(Note: since these do carry quite the wallop of bourbon, they aren't a suitable sweet for the kiddos!)

Happy Holidays and Happy Cooking!
sld

Monday, May 11, 2015

Not Always from Scratch {Luscious Lemon Bars}


In our family, most all desserts are home-made. Almost exclusively, when I look back on photos from when I was a kid that have us gathered around a cake, blowing out candles or such, it is my mother's amazing cinnamon-chocolate cake taking center stage. Chocolate chip cookies? Home-baked. Sugar-cookies? No refrigerated dough for us - home-baked. Grandma Mary's Pecan Tarts and other treats...all. home-made. In addition to a penchant for making things our own selves, we also have quite a quirky humor. So, the running joke goes, "Did you make this yourself?" "Why, yes, I made it from scratch. I scratched the whole time I made it."  ba-dum-bump. 

During the 70's, my mother tried her hand at "pride-food", thinking a box mix cake, or what have you, would be a lifesaver and what she found out is that she might just be the only person on the planet that can't bake things from a mix. The cakes would always turn out wonky - flat in some places, raised in others...just off. So, she gave up on that and went back to baking from scratch. 

That being said, our family does have a few great, standard dessert offerings that use a box mix cake as the beginnings of something else entirely. These lemon bars are just one such item.  When I realized, Thursday afternoon, that I'd signed up to bring a sweet treat to my son's school for Teacher Appreciation Week, *and* I had just returned from the store, I crossed my fingers and hoped that my well-stocked pantry and fridge didn't fail me. Lemon cake mix? Check. Eggs? Check. Cream Cheese? welllll, not a block of standard cream cheese, but I did have an 8 oz. tub of whipped cream cheese. It would have to do. I also was lacking a bit of the confectioners' sugar that the recipe called for, but by subbing in some granulated sugar, we were in business. 


Luscious Lemon Bars

(adapted from Barbara Dill)


  • 1 box lemon cake mix
  • 3 eggs
  • 1/2 C butter (softened)
  • 1 8 oz tub whipped cream cheese
  • 1 box (16 oz.) powdered sugar (note: I'm not even sure they sell it in boxes anymore; I had about 12 oz (weighed) of powdered sugar and made up the balance with white granulated sugar)
  1. Preheat oven to 350 F.
  2. In a large bowl, mix cake mix, 1 egg and softened butter. I used a pastry blender (see here) until pea sized crumbs form. Press mixture into the bottom of a 9X13 cake pan.
  3. In a large bowl (you can use the same one as for the crust), mix together the cream cheese, sugar(s) and 2 slightly beaten eggs. Mix until well blended and then pour over the pressed cake mixture.
  4. Bake at 350 F for 15 minutes; lower heat to 300 and bake for an additional 30 minutes.
  5. Remove from oven and allow to cool on a rack. Once completely cool, cut into squares and serve. Store in fridge.
This is a super easy dessert to make. The fact that it is a bar dessert makes it uber easy to transport for potlucks and the like. I've not tried other cake mix flavors, but I'm pretty sure there are some good alternate choices with Strawberry and Pineapple immediately coming to mind. (Of course, we'll have to come up with some good alliterative names to go along with them.)  If you don't tell anyone that you used a box mix, I won't either! 

Happy Cooking!
sld

Friday, December 5, 2014

Sweet Memories {Chocolate Pecan Pie with Salted Caramel Sauce}

My grandparents had an enormous Pecan tree in their backyard. When I was little, we'd go over to their house when the nuts dropped and pick them up. PoPo, my grandfather, would crack them in the garage or on the driveway with his inertia nutcracker (like this one found here) Then, we'd split them up and go to work on "picking out the pecans" It was a tedious job, but what else were we going to do with our hands while we watched TV? As there were no "devices" except maybe a Merlin game or a Simon, there was plenty of time on our hands. As the years passed, PoPo found a place in San Antonio that would crack them for a small price by the pound. He'd take them there for the cracking but if you wanted them picked out too then you'd pay a pretty penny. So, we never got out of picking duty. 

Having sacks and sacks of those delicious pecans stored in the freezer was a real treat. My mother would roast and salt them and sometimes coat them with honey for a tasty snack. My grandmother made the most amazing Pralines and also delicious Pecan Sandies (stories for another time.) I love all of those, but I really do love pecans, chocolate and caramel. So, when I happened upon this recipe, I knew I had to try it, and after I tried it, I knew it was a keeper.


Chocolate Pecan Pie with Salted Caramel Sauce

adapted from Southern Living Magazine


Chocolate Pie Filling

  • 1.5 C white sugar
  • 3/4 C butter, melted
  • 1/3 C all purpose flour
  • 1/3 C unsweetened cocoa powder
  • 1 Tbsp light corn syrup or other liquid sweetener of your choice(honey, cane syrup, sorghum syrup, etc.)
  • 1 tsp vanilla extract
  • 3 large eggs
  • 1 C chopped pecans, toasted (this is a can't miss step - make sure you roast them!)
  • 1 unbaked deep dish pie shell (your favorite recipe or purchased- your choice)
Salted Caramel Sauce

  • 3/4 C white sugar
  • 1 Tbsp fresh lemon juice
  • 1/3 C heavy whipping cream
  • 4 Tbsp butter
  • 1/4 tsp salt
  • 2 C pecan halves, toasted (again, make sure you don't skip this step)
  • 1/2 tsp sea salt 
  1. Preheat oven to 350F. In a large bowl, stir together first 6 of the pie filling ingredients. 
  2. Add eggs, stirring until well blended. Fold in the chopped pecan pieces. Pour mixture into the prepared pie shell.
  3. Bake at 350F for about 35 minutes. (Filling should look a bit loose, but it will firm up and set as it cools.) Remove baked pie from oven and allow to cool on a wire rack.
  4. In a medium saucepan over high heat, bring 3/4 C sugar, 1 tbsp lemon juice and 1/4 C water to a boil. (Resist the urge and do not stir!) Boil, after the sugar begins to change color, swirl mixture occasionally and continue to cook until the sugar takes on a dark amber color (about 8 minutes) (Make sure to stay near the pot as the sugar could scorch and burn quickly once it begins to take on some color.)
  5. Remove mixture from heat; add cream and 4 Tbsp butter. Stir constantly until the bubbling slows down and the butter is fully incorporated. Stir in table salt.


Putting it all together: Arrange pecan halves on pie (fabulous looking if you do concentric circles from outer edge to center). Top with warm caramel sauce and allow to cool/set for about 15 minutes. Sprinkle with sea salt flakes.

This fudgy, sweet chocolate pie with the nuttiness of the roasted pecans is divine. Add that sweet and salty tang of the caramel sauce and you've just entered an entirely new level of deliciousness. 


Happy Cooking!
sld

Tuesday, April 16, 2013

Tiramisu Squares


The PTA at my children's elementary school has a hospitality committee that coordinates luncheons for the teachers and staff about once a month. They are usually thematic: soup and salads, flavors of Mexico, baked potatoes, etc. This month, the theme was Italian. I signed up to bring a couple of savory items and a dessert. Many times at home, when we have an Italian themed party, I like to serve a classic tiramisu. I make individual servings in some of my mother's antique crystal goblets rather than a large trifle to be scooped and served.

However, for a take-it-to-school luncheon, that wasn't really going to work. It needed to be something easily divisible, easily transported, but ultimately delicious. I thought of a number of other choices - brownies? blondies? pecan squares? They are all great, but my mind kept returning to tiramisu.

I mean, why wouldn't it? Tiramisu (literally meaning 'to lift me up' or 'to pick me up' and metaphorically meaning to make me happy) is made of ladyfingers dipped in espresso, layered with a marscapone custard that is flavored with Marsala, and cocoa. It totally fits both meanings - with a heaping scoop of dee-lish on top.

So, yes, this had to be changed up to suit this Italian luncheon. Taking a few liberties with the original recipe for tiramisu by subbing cream cheese and sweetened condensed milk for the marscapone and custard, and replacing marsala with Kahlua,  here's the recipe: 


Tiramisu Squares


Ladyfinger Crust:

  • 2 C of crumbs of Biscotti Savoiardi ladyfingers (16 cookies) (I used Alessi brand which can be found in the international foods aisle or specialty Italian section of the grocery store (see note below)) 
  • 2 Tbsp of sugar
  • 1/2 C butter, melted

Filling Layer: 
  • 2 (8 oz) pkg. cream cheese, softened (reduced fat/neufchatel will work as well)
  • 1 (14 oz) can sweetened condensed milk
  • 1 Tbsp instant espresso powder(find near the instant coffee)
  • 1 Tbsp vanilla extract
  • 2 eggs
  • 1 C chocolate chips (preferably semi-sweet or dark chocolate)
Topping Layer:
  • 4 oz cream cheese, softened
  • 3/4 C heavy whipping cream
  • 1 Tbsp Kahlua liqueur (optional)
  • 1 Tbsp sugar
  • Ground chocolate or cocoa powder for garnish, optional

  • For crust: Preheat oven to 350F. Lightly grease a 9x13 in cake pan (I used pyrex). In a medium bowl, stir together the cookie crumbs, sugar and melted butter until the crumbs have been evenly moistened. Dump this mixture into the pan and then, using slightly dampened hands, press firmly and evenly to create a level crust that fills the bottom of the pan.  Bake for about 10 minutes until crust is set and lightly golden. Remove pan from oven and let crust cool completely before adding the filling.
  • For filling: While crust cools, in the bowl of a stand mixer (or medium sized bowl if using a hand mixer)  beat the two packages of cream cheese until smooth. Add in the condensed milk and beat until well-blended. Then, beat in the coffee powder, vanilla, and eggs.
  • Stir the chocolate chips into the filling mixture and pour over the baked biscotti crust. Bake at 350F until the edges are set (the center will be mostly set, but not completely) As all ovens cook differently keep an eye on this but it should take about 25-35 minutes. Cool at room temp for 30 minutes and then pop into the fridge for at least another 30 minutes to cool completely.
  • Once the baked cheesecake is cooled, prepare the topping. In a small bowl (or in the bowl of a stand mixer using the whisk attachment) beat the whipping cream, sugar and Kahlua(if using), until soft peaks form. Then, beat in the 4 oz of cream cheese until the topping is fluffy. 
  • Spread the topping over the cooled cheesecake and sift the powdered chocolate or cocoa over the top. Refrigerate until thoroughly cooled and then cut into squares. Store covered in the fridge until ready to serve.
Note: Try to find the biscotti ladyfingers (Follow link to see package: this) rather than the soft spongy ladyfingers that can sometimes be found in the refrigerated bakery section of the store. If you can only find the spongy ones, then you will need to toast them in the oven until crisp so that they can be broken into crumbs - then proceed as detailed above.)
These turned out better than I imagined and as I didn't receive my foil pan back with any leftovers, I'm assuming they were well received at the luncheon as well. They are a good mix of not-so-sweet cream cheese and chocolate mixed with the tooth-hurting sweetness of the condensed milk. A sort of sharp-sweet, chocolately-coffee delight that fits the bill when you need a "pick me up."

Happy Cooking!

sld


Thursday, February 14, 2013

Buttery Pecan Blondies

Shhhh....can you keep a secret? I've baked up a treat for my family for Valentine's Day and well, I've almost made myself sick with small little tasters of the end result. I am going to have to leave the house to keep from eating the whole pan of this delicious goodness.  These treats are especially good for any of you who are dessert lovers but who are not fans of chocolate (is there such an animal?), and for those of you who are chocolate lovers, I don't think you'll miss it after you try these.


Buttery Pecan Blondies with Brown Sugar Butter Frosting (adapted from Rebecca Rather)

Blondies: 

  • 1 C unsalted butter, at room temp
  • 3 C brown sugar, firmly packed
  • 4 large eggs
  • 1 Tbsp vanilla extract
  • 3 C all-purpose flour
  • 1 Tbsp baking powder
  • 1 Tsp salt
  • 2 C chopped pecans
Icing:
  • 1 C unsalted butter
  • 2 C brown sugar, firmly packed
  • 4 C powdered sugar
  • 1/3 C cream (or milk)
  • 1 Tbsp vanilla extract
Blondies:
  1. Preheat oven to 350F. Butter and lightly flour a 13x18 inch half-sheet pan. Using an electric mixer, beat 1 cup butter with the brown sugar on med-high speed until fluffy (about 5 minutes). Add the eggs and vanilla and beat until well combined (another 2 minutes or so). 
  2. In a bowl, whisk together the dry ingredients: flour, baking powder and salt. Add the flour mixture to the butter mixture and beat on low until well incorporated. Stir in the pecans.
  3. Dump into the prepared pan and spread using a spatula until the entire pan is filled. Smooth the top. Bake until the bars are set & slightly puffed & lightly browned about  20-25 minutes. Cool completely before making the icing and icing the pan of goodies.
Icing:
  1. Once the blondies are cooled: In a saucepan, over medium heat, melt the butter and the brown sugar. Once the mixture is lightly bubbling, reduce heat to med-low and cook, stirring occasionally to ensure the sugar and butter completely meld together, for about 2 minutes more. Set aside.
  2. Using an electric mixer, beat the powdered sugar and cream or milk and vanilla on med. speed until creamy, about 1 minute. Add the melted butter mixture to the powdered sugar mixture and beat until combined.
  3. Pour over the cooled blondies and spread evenly. Let sit for about 30 minutes for the frosting to set up before cutting into squares (size of your choice).
These are a super moist, rich delicious treat that are both homey and decadent at the same time. Since they keep well, 3 days uncut in the pan or once cut, they can be wrapped and frozen for about 3 weeks, they are a great thing to make in advance of an event as a time-saver.

Happy Cooking!
sld